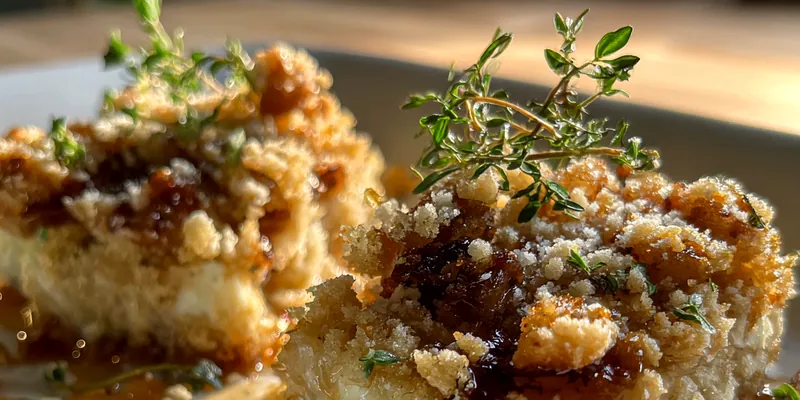
Snowy Vanilla Crumble
The Snowy Vanilla Crumble is a delightful dessert that brings together the rich flavors of vanilla and a crunchy crumble topping. This dessert is perfect for gatherings or cozy nights at home, offering a sweet yet subtle taste that is sure to impress. Its origins trace back to traditional American desserts, where simple ingredients come together to create something truly special. The combination of creamy and crunchy textures makes every bite a delicious experience. Whether served warm or at room temperature, it's a great way to end any meal.

Why This Snowy Vanilla Crumble Works
The Snowy Vanilla Crumble succeeds because of its harmonious balance of flavors and textures. The combination of creamy vanilla and crunchy topping creates a delightful contrast that keeps you coming back for more. The crumble is not overly sweet, allowing the natural flavors of the vanilla to shine through. Additionally, the use of fresh ingredients ensures a rich taste that is both satisfying and comforting.
What makes this dessert special is its versatility; you can easily adapt the recipe to include seasonal fruits or nuts. The inclusion of rolled oats adds a wholesome touch, making it a comforting yet indulgent treat. Moreover, the vanilla glaze elevates the dish, adding a beautiful finish that looks as good as it tastes. This crumble is not just a dessert but an experience that brings joy to every bite.
💡 Professional Tip
For the best results, ensure your butter is at room temperature before mixing, as this creates the perfect consistency for the crumble. Additionally, don’t skip the vanilla extract; it’s the star ingredient that elevates the flavor profile. If you're looking for added richness, consider using brown sugar in place of granulated sugar for a deeper flavor. Lastly, allow the crumble to cool slightly before serving; this helps the flavors to meld beautifully.
Frequently Asked Questions
Yes, you can definitely make Snowy Vanilla Crumble ahead of time. Prepare the crumble and store it in an airtight container in the refrigerator for up to two days before baking. When you’re ready to bake, simply add a few extra minutes to the cooking time to ensure it’s heated through. Alternatively, you can bake it the day before and reheat it gently before serving.
You can substitute the all-purpose flour with a gluten-free blend to accommodate dietary restrictions. For the sugar, coconut sugar or honey can be used, but adjust the quantities as needed. If you don't have vanilla extract, consider using almond extract for a different flavor profile. You can also omit the nuts and coconut if allergies are a concern, as the crumble will still taste delicious without them.
The Snowy Vanilla Crumble is done when the top is golden brown and the edges are slightly crisp. A toothpick inserted into the center should come out clean or with a few moist crumbs attached. Keep an eye on the edges; they should be firm and not overly soft. If you notice it browning too quickly, you can cover it with foil to prevent burning while the center continues to cook.
Yes, you can freeze Snowy Vanilla Crumble for later enjoyment. Allow it to cool completely, then slice it into squares and place them in an airtight container or freezer bag. It can be stored in the freezer for up to three months. When you’re ready to enjoy it, simply thaw in the refrigerator overnight and reheat in the oven for the best texture.
Snowy Vanilla Crumble pairs beautifully with a scoop of vanilla ice cream or a dollop of whipped cream for added richness. You can also serve it with fresh berries or a drizzle of chocolate sauce to enhance the dessert experience. For a delightful twist, consider pairing it with a hot beverage like coffee or chai tea. This combination not only balances the sweetness but also elevates the overall flavor profile.
Snowy Vanilla Crumble can be stored in an airtight container at room temperature for up to 2 days. If you prefer to keep it fresh for a longer period, refrigerate it for up to a week. Just ensure it's properly sealed to prevent it from drying out. Reheating in the oven can help restore its original texture if it has been stored in the fridge.
While Snowy Vanilla Crumble is not traditionally spiced, you can customize it to your taste. Adding a pinch of nutmeg or ginger can introduce a warm flavor that complements the vanilla nicely. If you enjoy a bit of heat, consider incorporating a touch of cayenne or black pepper to contrast the sweetness. Just remember to start with small amounts and adjust as needed to find your perfect balance.
The best way to reheat Snowy Vanilla Crumble is in the oven. Preheat your oven to 350°F (175°C) and place the crumble in an oven-safe dish. Cover it with foil to prevent the top from browning further and heat for about 10-15 minutes, or until warmed through. Alternatively, you can reheat individual portions in the microwave for about 30 seconds to 1 minute, but this may make the crumble less crispy.
Recipe Troubleshooting Guide
Too Dry
Problem: If your Snowy Vanilla Crumble turns out too dry, it might be due to an excess of flour or not enough butter. Overbaking can also lead to a dry texture.
Solution: To fix this, ensure you measure your ingredients accurately, especially the flour. You can add a little extra melted butter to the crumble mixture before baking to help retain moisture. If it’s already baked, serve it with a scoop of ice cream to add moisture back into the dish.
Not Crispy
Problem: If your crumble isn’t crisping up as expected, this could be a result of not using enough butter or the oven temperature being too low.
Solution: Ensure you use the correct amount of butter and consider increasing your oven temperature slightly. You can also broil the crumble for a minute or two at the end of baking to achieve that desired crispiness—just keep a close eye on it to prevent burning.
Overcooked
Problem: Overcooking can lead to a hard and unappetizing crumble that lacks flavor.
Prevention: To prevent this, always check for doneness a few minutes before the recommended baking time. If you find that you’ve overcooked it, serve it with whipped cream or a sauce to help mask the dryness.
Undercooked
Problem: If your Snowy Vanilla Crumble is undercooked, it may appear too soft or gooey in the center.
Recovery: In this case, return it to the oven to bake for an additional 5-10 minutes. Cover the top with foil if it's browning too quickly while the center continues to cook through.
Burnt
Problem: A burnt crumble can result from too high an oven temperature or leaving it in for too long.
Prevention: To prevent this in the future, always keep an eye on your crumble as it bakes and consider using an oven thermometer to ensure accurate temperature. If the top is getting too dark, you can cover it with foil until the center is done cooking.
Flavor Balance
Too Sweet: If your Snowy Vanilla Crumble is too sweet, it may overwhelm the vanilla flavor.
Too Salty: A salty taste could come from using salted butter instead of unsalted.
Bland: If lacking flavor, consider adding more vanilla extract or spices like cinnamon to enhance the profile.
Key Ingredients
The main ingredients for Snowy Vanilla Crumble include all-purpose flour, granulated sugar, and unsalted butter. These components form the base of your crumble, providing structure and sweetness. The addition of rolled oats gives a hearty texture and nutty flavor, while the vanilla extract is crucial for infusing that rich aroma. You can also customize with optional ingredients like chopped nuts or shredded coconut for added crunch.
Seasonings play a vital role in enhancing the flavor of your crumble. The use of baking powder helps the crumble rise and achieve a fluffy texture. A sprinkle of salt balances the sweetness, while cinnamon adds a warm, comforting note that pairs beautifully with vanilla. The glaze made from powdered sugar and milk not only sweetens the dish but also adds a beautiful finish.
Essential Ingredient Notes
- Main Ingredient: All-purpose flour is essential for creating the structure of the crumble. It provides the necessary gluten that helps bind the ingredients together while baking. Make sure to measure accurately to avoid a dense texture. For a gluten-free version, consider substituting with almond or coconut flour.
- Second Key Ingredient: Granulated sugar contributes sweetness and helps create a golden-brown crust. You can adjust the amount based on your preference for sweetness. Brown sugar can be used for a richer flavor, but it will alter the texture slightly. Whichever you choose, ensure it’s mixed well with the other dry ingredients for even sweetness.
- Essential Seasoning: Vanilla extract is the star of this dessert, infusing it with a rich, aromatic flavor. Always opt for pure vanilla extract for the best taste, avoiding imitation if possible. Additionally, using fresh spices like cinnamon can elevate the flavor profile. Remember, a little goes a long way, so start with a small amount and adjust according to your taste.
Cooking Process
Start by gathering all your ingredients and preheating the oven. Preparing your baking dish ahead of time ensures a smooth workflow. The key is to properly combine your dry ingredients before adding the butter, which helps distribute the fats evenly. Mixing until just combined prevents overworking the dough, resulting in a tender crumble.
Once the crumble is baked to a golden perfection, cooling it slightly before drizzling with glaze allows the flavors to meld. Serve it warm for the best experience; the contrast of the warm crumble with cold ice cream is simply divine. Presentation matters, so consider garnishing with fresh fruit or a dusting of powdered sugar for an impressive touch.
Key Technique
The technique of mixing butter into the dry ingredients is crucial for achieving the perfect crumble texture. It's important to work the butter in until the mixture resembles coarse crumbs, which helps create that signature crunchy top. Avoid overmixing, as this can lead to a tough texture. Additionally, baking at a consistent temperature ensures even cooking and prevents burning.
Snowy Vanilla Crumble
📋 Ingredients
Main Ingredients
- 1 cup powdered sugarfor the glaze
- 1/4 cup milkto thin the glaze
Sauce/Seasoning
- 2 cups all-purpose flourfor the base
- 1 cup granulated sugarfor sweetness
- 1 cup unsalted butter, softenedfor richness
- 1 tablespoon vanilla extractfor flavor
- 1 teaspoon baking powderfor leavening
- 1/2 teaspoon saltto balance flavors
- 1 cup rolled oatsfor texture
- 1/2 cup chopped nuts (optional)for crunch
- 1/2 cup shredded coconut (optional)for flavor
Instructions
Preheat the Oven
Begin by preheating your oven to 350°F (175°C). This ensures that your Snowy Vanilla Crumble bakes evenly and thoroughly. Prepare your baking dish by greasing it lightly with butter or cooking spray.
Prepare the Crumble Mixture
In a large mixing bowl, combine the flour, sugar, baking powder, and salt. Mix in the softened butter and vanilla extract until the mixture resembles coarse crumbs. Stir in the rolled oats and chopped nuts or shredded coconut if using for added texture.
Layer the Base
Press about two-thirds of the crumble mixture into the bottom of your prepared baking dish. This will create a firm base for your dessert. Make sure it’s evenly spread to ensure consistent baking throughout.
Prepare the Topping
Sprinkle the remaining crumble mixture over the top of the base layer. This will create that signature 'snowy' appearance when baked. You can also add a bit more oats or nuts on top for a decorative touch.
Bake the Crumble
Place your baking dish in the preheated oven and bake for 25-30 minutes. Keep an eye on it; the top should turn a golden brown while the edges get slightly crispy. This is when the delightful aroma fills your kitchen!
Prepare the Vanilla Glaze
While the crumble is baking, combine the powdered sugar and milk in a small bowl. Whisk until smooth to create a glaze. This will add a sweet finish to your Snowy Vanilla Crumble.
Cool and Drizzle
Once baked, remove the crumble from the oven and allow it to cool for about 10 minutes. Drizzle the vanilla glaze over the top while it’s still warm, allowing it to seep into the layers.
Serve and Enjoy
Cut the Snowy Vanilla Crumble into squares and serve warm or at room temperature. This dessert pairs beautifully with a scoop of vanilla ice cream or a dollop of whipped cream.
Recipe Notes & Tips
Storage Tips
To store your Snowy Vanilla Crumble, allow it to cool completely before placing it in an airtight container. It can be kept at room temperature for up to two days or refrigerated for a week. If you prefer, you can also freeze it for longer storage, just remember to wrap it tightly to avoid freezer burn.
Serving Ideas
For a delightful twist, serve your Snowy Vanilla Crumble with fresh berries or a scoop of ice cream. Drizzling caramel or chocolate sauce on top can elevate the dessert experience. You can also garnish with a sprig of mint for a touch of color and freshness.
Variations
Feel free to customize this recipe by adding seasonal fruits like apples or berries into the base layer. For a more decadent version, consider incorporating chocolate chips or a layer of cream cheese. Experimenting with different spices or extracts can also yield unique flavors that cater to your taste.